A reliable solar garden light quality-control plan should verify five areas before shipment:
- Solar panel and charging performance
- Battery voltage, capacity and consistency
- LED brightness, sensors and lighting modes
- Waterproof structure and outdoor durability
- Packaging, labeling and bulk-production consistency
Testing only one finished sample is not enough.
Importers, wholesalers, retailers and private-label brands should confirm the approved product configuration before production, inspect key components during manufacturing and randomly test completed products before shipment.
This guide explains how buyers can create a practical solar garden light inspection checklist, compare samples with mass production and reduce the risk of short runtime, weak charging, water ingress, inconsistent brightness and packaging problems.
Buyers looking for a complete product range can also visit LEDORA’s solar garden lights manufacturer and OEM supplier page or explore the current solar garden light collection.

Why Solar Garden Light Quality Control Is Different
A conventional plug-powered light receives a relatively stable electrical input.
A solar garden light must collect, store and use its own energy. Its nighttime performance depends on several connected components:
- Solar panel
- Rechargeable battery
- Controller
- LED light source
- Light sensor
- Motion sensor, when applicable
- Housing and waterproof structure
- Internal wiring and connections
A product can look correct and switch on during a short inspection but still fail after outdoor installation.
Common problems include:
- Solar panel output below specification
- Inflated battery-capacity claims
- Battery inconsistency between units
- Insufficient outdoor charging
- Short nighttime runtime
- Brightness decreasing too quickly
- Light sensor failing to activate
- PIR sensor responding incorrectly
- Water entering the housing
- Corroded battery contacts
- Incorrect lighting color
- Missing accessories
- Weak individual packaging
Quality control should therefore evaluate the complete energy and lighting system rather than only the product appearance.
The Five-Stage Solar Light Quality-Control Process
A complete inspection plan should begin before mass production and continue until shipment.
| Quality-Control Stage | Main Objective | Typical Checks |
|---|---|---|
| Product specification confirmation | Define exactly what will be produced | Model, battery, panel, LED, material, color, packaging and functions |
| Incoming material inspection | Prevent unsuitable components from entering production | Solar panels, batteries, LEDs, controllers, housings and packaging |
| In-process inspection | Identify problems during assembly | Wiring, soldering, sealing, switches, sensors and assembly consistency |
| Finished-product testing | Confirm performance of completed lights | Charging, brightness, runtime, modes, waterproofing and appearance |
| Pre-shipment inspection | Verify the final production lot | Quantity, random samples, defects, packaging, labels and documents |
Skipping the early stages creates more pressure on final inspection.
For example, a finished light may pass a short switch-on test even when the battery capacity or solar panel output is below the approved specification. By the time this is discovered during runtime testing, the entire production lot may already be assembled.
Step 1: Create a Clear Product Specification Sheet
Before sample approval or production, buyers should create one agreed specification sheet for each model.
The document should identify:
Product Information
- Product name
- Model number
- Product dimensions
- Product weight
- Housing material
- Housing color
- Installation method
- Accessories
Solar Panel Information
- Solar panel type
- Rated voltage
- Rated current
- Rated power
- Panel dimensions
- Panel cable length, where applicable
- Connector type
Battery Information
- Battery chemistry
- Nominal voltage
- Rated capacity
- Cell size or battery-pack dimensions
- Battery quantity
- Replaceable or non-replaceable structure
- Protection circuit, where applicable
Lighting Information
- LED type
- LED quantity
- Total power
- Lighting color
- Color temperature
- Lumen output, when applicable
- Lighting modes
- Brightness levels
Control Information
- Dusk-to-dawn control
- Manual switch
- PIR motion sensor
- Detection angle
- Detection distance
- High-light duration
- Remote-control functions
- Timer functions
Outdoor Protection
- Claimed IP rating
- Sealing structure
- Drainage structure
- Operating temperature, if verified
- Mounting requirements
Packaging Information
- Individual packaging
- Accessories
- Instruction manual
- Barcode
- Shipping mark
- Units per carton
- Carton dimensions
- Gross weight
The specification sheet should be attached to the purchase order.
Verbal descriptions such as “large battery,” “high brightness,” “waterproof” or “works all night” are not precise enough for production approval.

Step 2: Approve a Golden Sample
The approved sample should become the reference for mass production.
It is often called a golden sample, approval sample or sealed sample.
The sample should represent the exact configuration that the customer expects to receive, including:
- Product appearance
- Product color
- Lighting color
- Brightness
- Battery
- Solar panel
- Lighting modes
- Sensor function
- Logo
- Packaging
- Accessories
- Instruction manual
The buyer and supplier should both retain a matching approved sample whenever possible.
Photos alone may not be enough because they cannot confirm:
- Battery capacity
- Product weight
- Material thickness
- LED brightness
- Sensor sensitivity
- Runtime
- Waterproof structure
- Packaging strength
Changes made after sample approval should be recorded in writing.
If a battery, solar panel, LED or controller is replaced during production, the supplier should confirm whether the change affects charging, brightness, working time, compliance documents or product safety.
Step 3: Inspect Incoming Solar Panels
The solar panel controls how much energy the product can collect during the day.
Incoming solar panel inspection should include:
Appearance Inspection
Check for:
- Cracks
- Scratches
- Delamination
- Broken edges
- Surface contamination
- Loose wires
- Incorrect cable length
- Poor connector assembly
- Inconsistent panel color
Electrical Inspection
Measure:
- Open-circuit voltage
- Short-circuit current where appropriate
- Output under defined light conditions
- Polarity
- Connection stability
Measurements should be compared with the approved specification and performed under repeatable conditions.
Testing one panel in strong sunlight and another panel under weak indoor lighting does not provide a useful comparison.
Size and Structure
Confirm:
- Panel dimensions
- Panel thickness
- Mounting-hole position
- Cable position
- Connector type
- Waterproof sealing
A panel can display the correct nominal voltage while still producing insufficient current for the required charging time.
That is why voltage and current should be checked together.
Step 4: Test Battery Voltage and Capacity
The battery is one of the most important components in a solar light.
Common solar garden light configurations include:
- 1.2V Ni-MH batteries for decorative and low-power products
- 3.7V lithium-ion batteries for brighter pathway and motion sensor lights
- Larger lithium battery packs for higher-output products
LEDORA’s product materials include decorative firefly lights with 1.2V 600mAh Ni-MH batteries, selected IP68 ground lights with Ni-MH batteries and motion sensor products using lithium-ion batteries.
Battery inspection should include:
Battery Appearance
Check for:
- Swelling
- Leakage
- Rust
- Damaged insulation
- Loose terminals
- Incorrect wires
- Incorrect connector
- Incorrect physical dimensions
Voltage Test
Measure the battery voltage before installation and after charging.
Voltage testing can identify:
- Deeply discharged cells
- Incorrect battery chemistry
- Abnormal cells
- Poor charging
- Incorrect wiring
However, voltage alone cannot prove battery capacity.
A battery may show an acceptable voltage but provide very little usable energy under load.
Capacity Test
Selected batteries should be tested through controlled charging and discharging.
The test should record:
- Charging current
- Charging duration
- Starting voltage
- Discharging current
- Discharge duration
- Usable capacity
- Final voltage
- Test temperature
Printed capacity should not be treated as the only evidence.
Two batteries marked 1200mAh may perform differently because of cell quality, internal resistance and production consistency.
For a more detailed battery comparison, read LEDORA’s Ni-MH vs Lithium Batteries in Solar Garden Lights.
Battery Consistency
Mass-production batteries should be randomly checked for variation.
A production lot containing some strong cells and some weak cells can create inconsistent customer experiences, even when all finished products look identical.

Step 5: Inspect LEDs, Controllers and Sensors
LED Inspection
Confirm:
- Correct LED type
- Correct LED quantity
- Correct lighting color
- Consistent brightness
- No dead LEDs
- No abnormal flickering
- No visible color differences between units
- Stable operation in every lighting mode
For products sold in multipacks, lighting consistency is especially important.
Four pathway lights installed beside one another should not show明显 differences in brightness or color temperature.
Light-Sensor Inspection
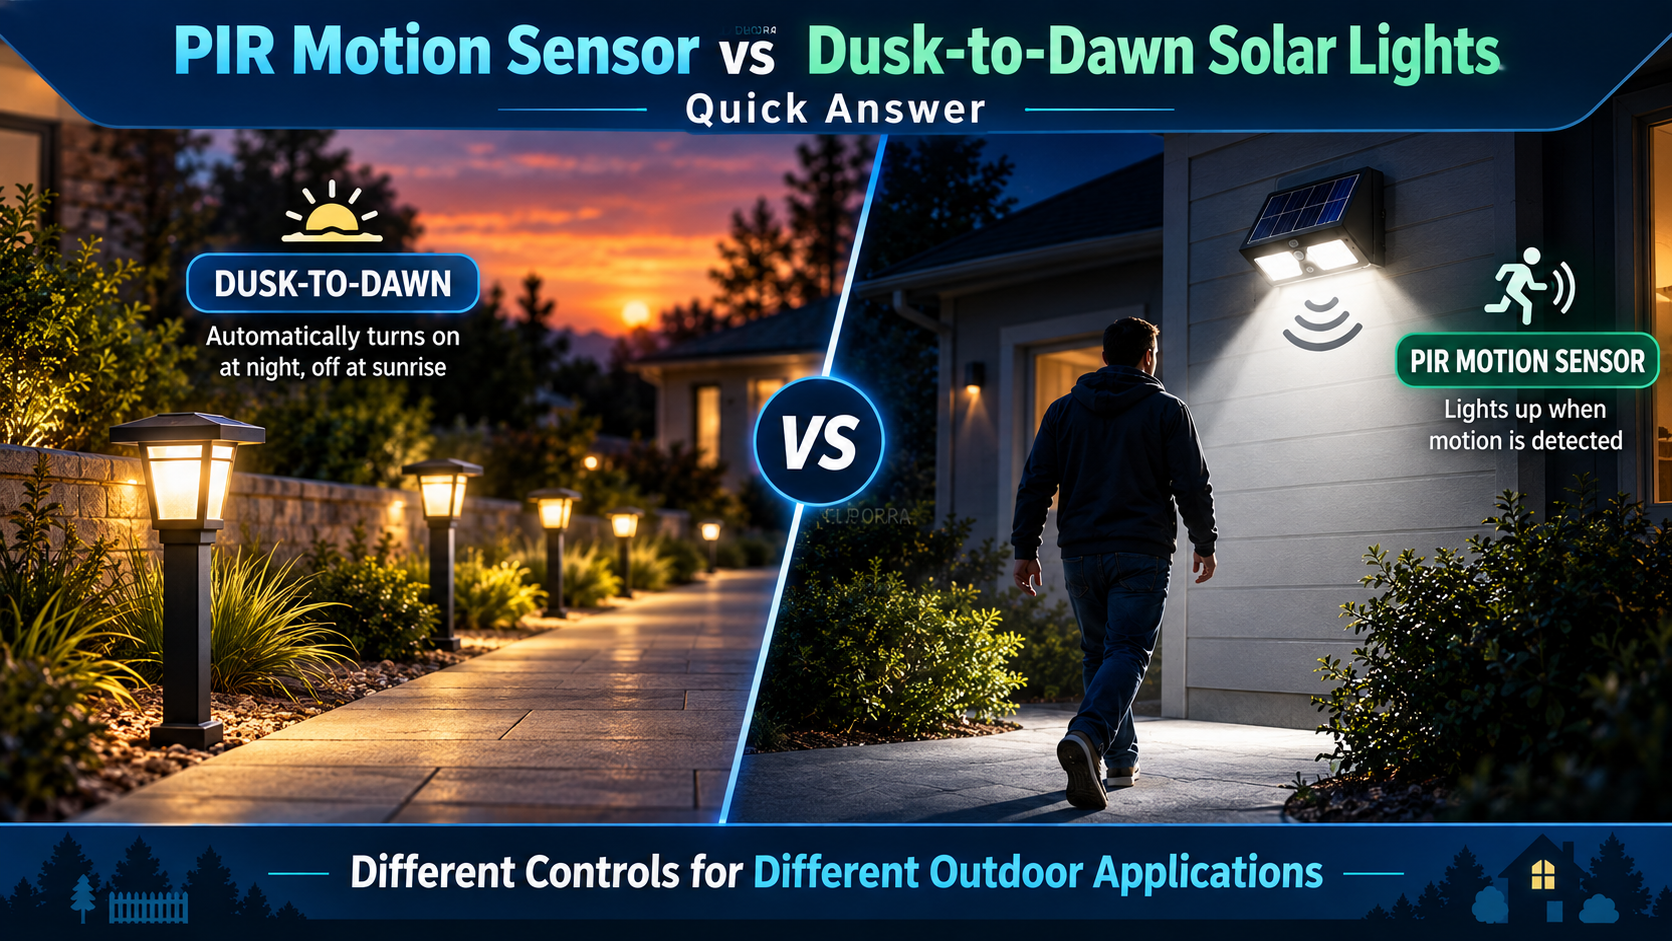
Dusk-to-dawn products should be tested by covering and uncovering the solar panel or light sensor.
Confirm that:
- The light switches on in darkness
- The light switches off under sufficient light
- The response is stable
- The product does not repeatedly flicker between on and off
- Every unit uses the same control logic
Motion-Sensor Inspection
For PIR motion sensor lights, check:
- Detection distance
- Detection angle
- Response time
- High-light duration
- Standby mode
- Repeated activation
- False activation
- Mode-switch logic
The test environment should be recorded.
Sensor performance measured in a small indoor room may differ from outdoor performance because of installation height, movement direction, temperature and surrounding objects.
Remote-Control Inspection
For remote-controlled products, confirm:
- On/off function
- Brightness adjustment
- Timer
- Lighting modes
- Color selection
- Control distance
- Battery installation
- Remote pairing, if required
The instruction manual should accurately match the actual button functions.
Step 6: Test Charging and Nighttime Runtime
A short function test only proves that the light can switch on.
It does not prove that the solar panel can recharge the battery or that the product can operate through the required nighttime period.
A complete runtime test should record:
| Test Item | Information to Record |
|---|---|
| Product model | Exact model and sample number |
| Charging method | Natural sunlight, solar simulator, USB or laboratory supply |
| Charging duration | Total charging hours |
| Weather conditions | Sunny, partly cloudy or cloudy |
| Battery | Chemistry, voltage and rated capacity |
| Solar panel | Voltage, current and rated power |
| Lighting mode | Constant, flashing, RGB, dim or motion sensor |
| Initial brightness | Lumen measurement or agreed visual reference |
| Brightness after 3 hours | Test result |
| Brightness after 6 hours | Test result |
| Total working time | Time before shutdown or minimum acceptable brightness |
| Final battery voltage | Measured result |
| Number of cycles | Repeated charging and discharging cycles |
| Tester and date | Quality-control record |
Solar Charging and USB Charging Must Be Separated
Some products support both solar and USB charging.
A product may operate for 12 hours after a full USB charge but receive only a partial charge from its solar panel during one outdoor day.
Therefore, buyers should test:
- Battery and lighting runtime after controlled charging
- Actual outdoor charging through the supplied solar panel
The second test is necessary to verify the real solar system.
For a complete runtime testing process, read LEDORA’s solar garden light runtime guide.
Brightness Should Be Monitored
Do not record only the time when the light finally turns off.
A light may remain illuminated for ten hours but become too dim after four hours.
Buyers should agree on the minimum acceptable performance, such as:
- Stable brightness for a defined number of hours
- Minimum brightness after six hours
- Acceptable dimming curve
- Total runtime before shutdown
- Motion sensor standby and activation performance

Step 7: Conduct Aging Testing
Aging testing operates completed lights for a defined period before shipment.
It helps identify early failures that may not appear during a short assembly-line inspection.
Aging tests can reveal:
- Unstable LEDs
- Intermittent connections
- Controller failures
- Weak batteries
- Abnormal charging
- Sensor problems
- Remote-control faults
- Unexpected shutdown
- Excessive brightness reduction
The aging plan should match the product category.
A simple decorative stake light and a high-brightness motion sensor light do not necessarily require identical procedures.
For solar lights, aging testing should ideally include more than continuous illumination.
It should also verify:
- Charging
- Automatic dusk-to-dawn switching
- Mode changes
- Discharging
- Recharging
- Repeated operation
Random completed products should also be checked after the aging process to ensure that the test itself did not reveal hidden failures.
Step 8: Verify Waterproof Protection
Terms such as “outdoor,” “weather-resistant” and “waterproof” should not be used as substitutes for a defined test level.
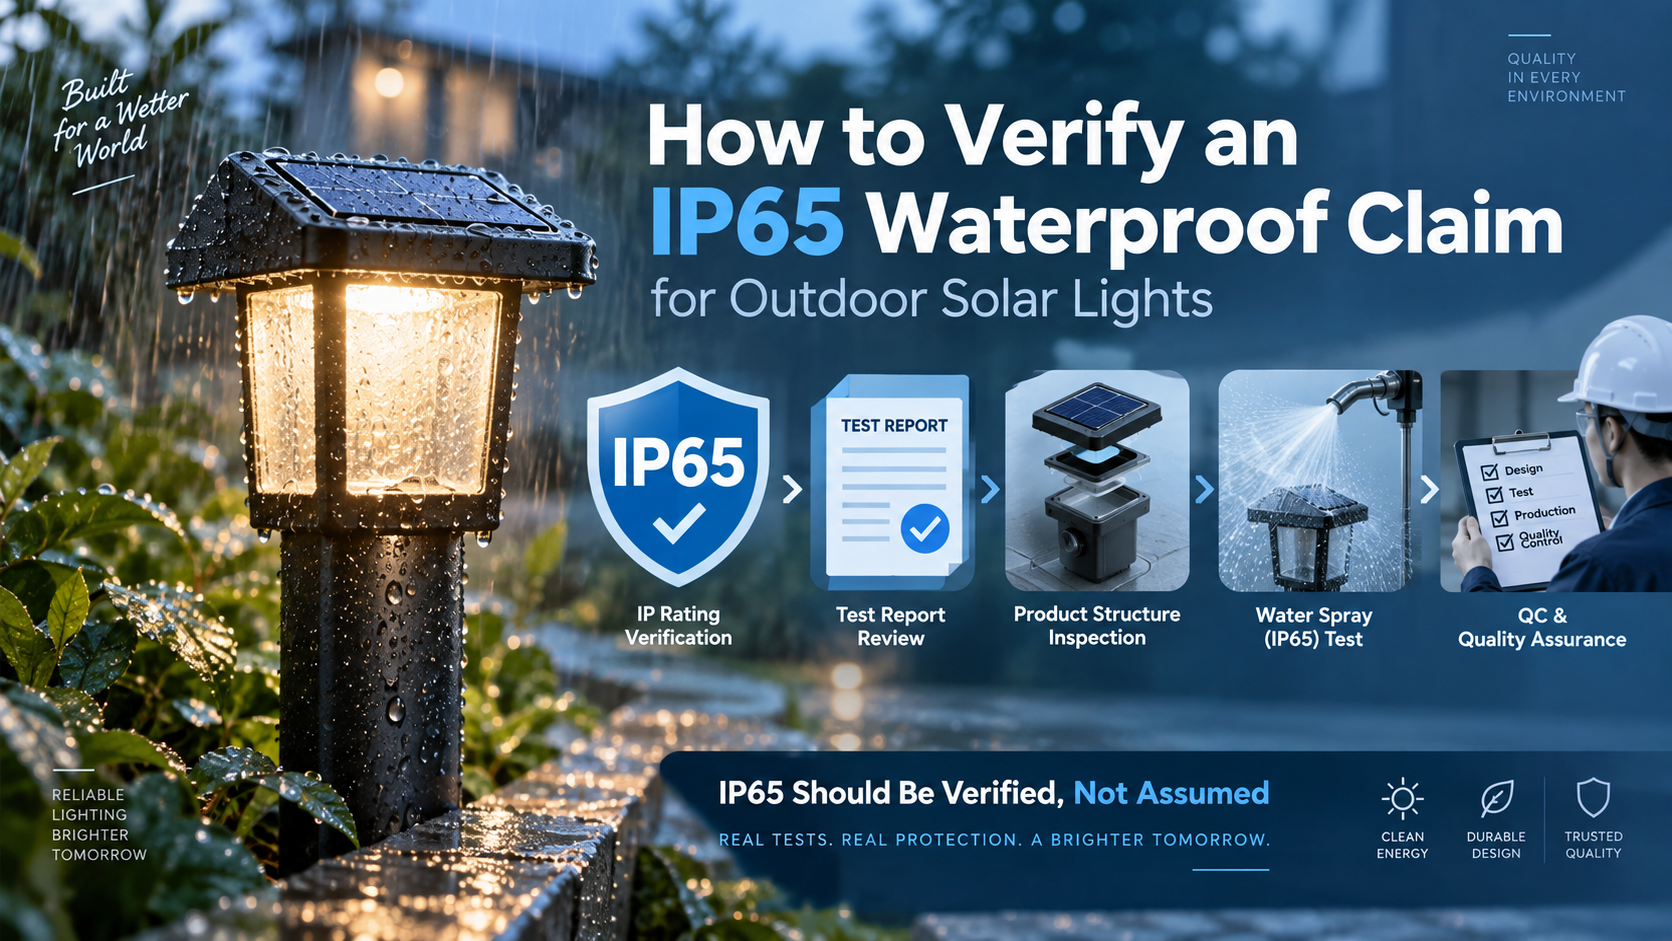
The IEC uses ingress protection codes to classify how an enclosure protects against dust and water. The first IP numeral relates to solid objects, while the second relates to water protection. The full test conditions are defined in IEC 60529. Buyers can review the official IEC ingress protection rating guide.
LEDORA’s solar lighting materials include different protection levels according to product design:
- Selected fence lights use IP54
- Many decorative and pathway lights use IP65
- Selected ground lights use IP68
The exact rating should be confirmed by model rather than applied to the complete product category.
Waterproof Inspection Should Check
- Housing joints
- Solar panel sealing
- Cable entry
- Switch position
- Battery compartment
- Lens connection
- Screw holes
- Drainage holes
- Sensor window
- Connector sealing
Test Method Must Match the Claim
An IP54 fence light should not be tested or marketed as an IP68 ground light.
Similarly, a product passing a short spray test does not automatically prove suitability for temporary or continuous immersion.
After water testing, inspect:
- Internal moisture
- Condensation
- Corrosion
- Lighting function
- Charging function
- Sensor response
- Battery voltage
- Electrical connections
Products should also be checked again after drying because some water-ingress failures appear later rather than immediately.

Quality-Control Priorities by Product Category
Different solar lights create different risks.
| Product Category | Main Quality-Control Priorities |
|---|---|
| Decorative firefly and flower lights | Flexible stems, LED quantity, lighting mode, battery, panel output and packaging protection |
| Solar pathway lights | Stake strength, installation stability, brightness consistency, runtime and sensor control |
| Solar ground lights | Waterproof sealing, housing strength, drainage, corrosion and ground installation |
| Solar fence and deck lights | Screw position, wall mounting, downward lighting angle, water resistance and multipack consistency |
| Motion sensor lights | PIR detection, high-light duration, lithium battery, solar charging and operating modes |
| Remote-controlled lights | Remote function, timer, control distance, instructions and spare remote battery |
| Solar string lights | Cable length, LED quantity, wire connection, panel output, mode controller and winding method |
This is why a single generic inspection checklist should not be used without model-specific requirements.
Step 9: Check Materials and Product Construction
Plastic Housings
Inspect:
- Surface finish
- Color consistency
- Cracks
- Deformation
- Sharp edges
- Injection marks
- Fit between parts
- UV resistance documentation, when required
Stainless Steel and Metal Parts
Inspect:
- Scratches
- Dents
- Rust
- Coating
- Color consistency
- Sharp edges
- Metal thickness
- Adhesion of painted finishes
Stakes and Mounting Parts
Check:
- Correct quantity
- Correct dimensions
- Assembly fit
- Strength
- Straightness
- Screw holes
- Installation stability
A pathway light may function correctly but still create complaints when the ground stake breaks during installation.
Internal Wiring
Check:
- Polarity
- Soldering
- Loose wires
- Wire insulation
- Connector fit
- Strain relief
- Cable sealing
Poor internal connections can create intermittent failures that are difficult to identify through appearance inspection alone.
Step 10: Inspect Product Appearance and Functions
Every finished-product inspection should include an agreed checklist.
| Inspection Area | Examples |
|---|---|
| Appearance | No scratches, stains, cracks, deformation or visible damage |
| Dimensions | Product matches approved dimensions and tolerances |
| Color | Housing and lighting color match approved sample |
| Assembly | Parts fit correctly with no looseness or gaps |
| Switch | Correct position and stable operation |
| Sensor | Correct dusk-to-dawn or PIR response |
| Modes | Every mode operates in the correct sequence |
| Accessories | Stakes, screws, remote controls and manuals are complete |
| Labeling | Model, rating label, warning label and barcode are correct |
| Packaging | Product is protected and packed according to approval |
For multipack products, the inspection should also verify that every pack contains the correct number of lights and accessories.
Step 11: Verify Packaging Before Shipment
Good product performance does not prevent damage caused by unsuitable packaging.
Packaging inspection should confirm:
Individual Packaging
- Correct box type
- Correct artwork
- Product protected from movement
- Solar panel protected from scratches
- Stakes separated from fragile housings
- Cables wound correctly
- Accessories packed securely
- Manual included
- Barcode readable
Outer Carton
- Correct carton dimensions
- Correct units per carton
- Correct gross weight
- Correct shipping marks
- Suitable carton strength
- Proper sealing
- No excessive empty space
Drop and Transportation Testing
Depending on the sales channel, buyers may require:
- Individual-package drop testing
- Master-carton drop testing
- Vibration testing
- Compression testing
- Ecommerce packaging evaluation
Amazon and direct-to-consumer products may need stronger individual protection than products delivered in retail display cartons.
Packaging requirements should be confirmed before production, not after finished products are waiting for shipment.
Step 12: Use Random Sampling for Final Inspection
Inspecting only the first or easiest-to-reach cartons can produce an inaccurate result.
Final samples should be selected randomly from different:
- Cartons
- Pallets
- Production dates
- Assembly lines
- Sections of the shipment
ISO 2859-1:2026 provides lot-by-lot sampling schemes indexed by acceptance quality limit, commonly known as AQL. The exact inspection level and acceptance limits should be agreed between the buyer, supplier and inspection party before production.
Do not assume that one standard AQL setting is correct for every solar lighting project.
Inspection levels may depend on:
- Order quantity
- Product value
- Sales channel
- Customer-return risk
- Product complexity
- Previous supplier performance
- Safety requirements
Defect Classification
| Defect Level | General Meaning | Solar Light Examples |
|---|---|---|
| Critical defect | Could create a safety, legal or serious compliance risk | Battery leakage, exposed conductor, severe overheating or incorrect mandatory labeling |
| Major defect | Product cannot be sold or does not perform as agreed | Light does not switch on, incorrect battery, short runtime, failed sensor or water ingress |
| Minor defect | Product remains usable but appearance or presentation is below approval | Small scratch, slightly uneven label or minor packaging mark |
The buyer should define product-specific examples before inspection.
A defect considered minor for a low-cost promotional item may be unacceptable for a premium private-label retail product.

Step 13: Review Certifications and Technical Documents
Product inspection and market compliance are related but not identical.
A product can pass a visual inspection while still having incomplete or unsuitable compliance documents.
Buyers should confirm:
- Exact model covered by the document
- Product photographs
- Electrical configuration
- Battery type
- Solar panel
- Applicable standards
- Testing laboratory
- Report or certificate number
- Issue date
- Applicant and manufacturer information
- Destination-market requirements
For the European market, CE marking applies only where relevant EU product rules require it. The manufacturer must identify applicable requirements, complete conformity assessment, prepare technical documentation and issue an EU Declaration of Conformity. Buyers can review the official European Union CE marking guidance.
Electrical and electronic products may also need to meet applicable EU RoHS requirements.
Lithium Battery Documentation
For products using lithium-ion batteries, buyers may also need to confirm:
- Battery specification
- MSDS or SDS
- UN 38.3 test information
- Battery test summary
- Watt-hour rating
- Transport classification
- Shipping labels and packaging requirements
The UNECE Manual of Tests and Criteria includes procedures for lithium cells and batteries under subsection 38.3.
The exact requirements depend on the battery, product configuration, shipping method and carrier.
Sample Approval vs Bulk Production
One of the biggest risks in wholesale sourcing is a difference between the approved sample and mass production.
The following details should be compared:
| Comparison Item | Approved Sample | Bulk Production |
|---|---|---|
| Battery | Chemistry, voltage, capacity and dimensions | Must match approval or approved alternative |
| Solar panel | Type, voltage, current, power and size | Must match approved charging performance |
| LED | Type, quantity, brightness and color | Must remain consistent |
| Controller | Lighting modes and protection logic | Must use approved function sequence |
| Sensor | Detection and switching performance | Must meet agreed parameters |
| Housing | Material, color and dimensions | Must match approved appearance and structure |
| Waterproof structure | Seals, screws, cable entries and joints | Must remain unchanged |
| Packaging | Material, artwork, accessories and labels | Must match approved files |
Any approved alternative should be documented before installation into bulk products.
The phrase “same quality” is not sufficient without defining what components and performance must remain the same.
Questions Buyers Should Ask Before Approving Shipment
- Did mass production use the same battery as the approved sample?
- Were battery capacity tests completed?
- Were solar panel voltage and current checked?
- Was real outdoor solar charging tested?
- Which lighting mode was used for runtime testing?
- Was brightness monitored during the test?
- Were motion sensors checked at the agreed distance and angle?
- Was waterproof testing matched to the claimed IP level?
- Were products aged before packing?
- Were final samples randomly selected?
- What defect standard was used?
- Does the final packaging match the approved design?
- Are all accessories and instructions included?
- Do certificates and reports cover the exact model?
- Can the supplier provide photos, videos or inspection records?
Buyers can also review LEDORA’s solar garden light wholesale buying guide for additional product and supplier evaluation factors.
A Practical Pre-Shipment Checklist
Before releasing the balance payment or approving shipment, confirm:
Product
- Model and quantity are correct
- Appearance matches the approved sample
- Housing color is correct
- Product dimensions are correct
- Accessories are complete
Electrical System
- Solar panel specification is correct
- Battery specification is correct
- LEDs operate normally
- Lighting modes are correct
- Light sensor works
- Motion sensor works, when applicable
- Remote control works, when applicable
Performance
- Charging test completed
- Runtime test completed
- Brightness meets the agreed level
- Repeated cycle test completed
- Aging test completed
- Waterproof test completed
Packaging
- Individual packaging approved
- Artwork correct
- Barcode correct
- Manual correct
- Units per carton correct
- Carton dimensions and weights recorded
- Shipping marks correct
Documents
- Product specification sheet
- Sample-approval record
- Inspection report
- Battery documents
- Applicable test reports
- Packing list
- Commercial invoice
- Shipping documents
How LEDORA Supports Solar Lighting Quality Control
LEDORA supplies solar pathway lights, ground lights, fence lights, decorative garden lights and motion sensor products for importers, wholesalers, retailers, ecommerce sellers and private-label brands.
Quality-control support can be organized around:
- Product specification confirmation
- Sample preparation
- Incoming material inspection
- Solar panel and battery testing
- Lighting-function inspection
- Runtime and aging tests
- Waterproof testing
- Packaging confirmation
- Pre-shipment inspection
- Certification and export-document support
Customization options may include:
- Logo printing
- Private-label packaging
- Housing color
- Lighting color
- Battery configuration
- Solar panel configuration
- Lighting modes
- Accessories
- Barcode labels
- Multilingual instructions
Not every adjustment is suitable for every model.
Changes involving batteries, solar panels, LEDs or control systems should be evaluated and tested as one complete energy system.
Learn more about LEDORA’s manufacturing and OEM capabilities on the About LEDORA and Services pages.

Frequently Asked Questions
What should be tested on a solar garden light?
Buyers should test the solar panel, battery, charging performance, runtime, LEDs, lighting modes, sensors, waterproof structure, appearance, accessories, packaging and production consistency.
Is switching the light on enough for inspection?
No. A switch-on test only confirms immediate function. It does not verify solar charging, battery capacity, runtime, waterproofing or long-term stability.
How do buyers test solar panel quality?
Solar panels can be checked for appearance, dimensions, open-circuit voltage, current output, polarity, cable connection and charging performance under defined lighting conditions.
How should solar light battery capacity be tested?
Selected batteries should be charged and discharged under controlled conditions. The test should record voltage, current, time, usable capacity and final voltage.
Should solar charging and USB charging be tested separately?
Yes. USB charging can verify the battery and lighting system, but only a solar charging test can confirm whether the supplied panel can recharge the product outdoors.
How long should solar lights be tested?
The test duration depends on the product. Runtime testing should continue until the light reaches the agreed minimum brightness or switches off. Several charging and discharging cycles are preferable to one test.
Does IP65 mean the light can be immersed in water?
No. IP ratings represent different protection levels and test conditions. Buyers should review the exact rating and corresponding test method rather than treating all waterproof claims as equivalent.
What is a golden sample?
A golden sample is the approved product used as the reference for mass production and final inspection. It should include the agreed product, functions, components and packaging.
What is AQL inspection?
AQL inspection uses a defined sampling plan to determine how many randomly selected products should be inspected and how defects are evaluated. The inspection level and defect limits should be agreed before production.
Should every solar light be inspected before shipment?
The inspection plan depends on the product, order and buyer requirements. Key functions may be checked during production, while final random sampling can be used for detailed pre-shipment inspection.
How can buyers prevent sample and bulk-production differences?
Record the battery, solar panel, LED, controller, housing, functions and packaging in the purchase order and approved specification sheet. Any component change should require written approval.
Can LEDORA provide testing records?
Testing requirements and available records should be confirmed according to the exact product and order. Buyers should state required inspections, reports, photos or videos before production.
Final Recommendation
Solar garden light quality control should not begin after production is complete.
The most effective process is:
- Confirm the exact product specification
- Approve a representative golden sample
- Inspect solar panels, batteries and other incoming materials
- Control assembly, wiring, sealing and sensor installation
- Test charging, brightness, modes and runtime
- Verify waterproof protection
- Complete aging and final inspection
- Randomly inspect the final shipment
- Confirm packaging and technical documents
For wholesale buyers, the goal is not simply to find defects before shipment.
The goal is to prevent differences between:
- Quotation and sample
- Sample and production
- Production and packaging
- Product claims and real outdoor performance
A documented quality-control plan helps importers, retailers and private-label brands reduce returns, protect product reviews and create more stable long-term supply programs.
Request a Solar Garden Light Inspection Plan
LEDORA supplies solar garden lights for wholesale, retail, ecommerce and private-label programs.
Contact LEDORA to request:
- Latest solar garden light catalogue
- Product comparison sheet
- Sample quotation
- Battery and solar panel specifications
- Runtime testing information
- OEM packaging options
- Quality-control checklist
- Model-specific certification information
- Bulk-order pricing
- Estimated production lead time
Contact LEDORA for a Solar Garden Lighting Quotation
Please provide your target product category, estimated quantity, destination market, required functions, packaging requirements and quality-control standards.
You can also visit the LEDORA official Alibaba supplier page to review additional products and supplier information.